
Here is a creative and fun way to use the natural light from outside to illuminate a colorful window creation!
Instructions:
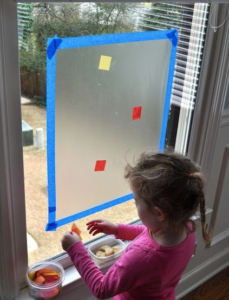
- Find a window in your home that gets good sunlight shining though
- When you find that window, cover it with clear plastic wrap (Saran Wrap). If it isn’t clinging well on its own, that’s fine! You can use some tape, preferably painters tape, or masking tape (so it can come off easily when you want to take it down)
- Once you have the plastic set up on the window, you have a couple options. If you have different colored tissue paper, you can have the kids rip it up, or cut it into shapes if they want sharper shapes, and tape (clear tape) the paper onto the plastic. If you have glue sticks, you can also use those to attach the tissue paper.
- If you do not have tissue paper, that is OK! You can certainly use markers, water based is best in case any gets through the plastic onto the window, and draw directly on the plastic wrap. They could color shapes, designs, or a picture.
- When you have completed filling in the plastic, it’s time for the sun to get to work! Once the sun is shining on it, it should shine through to brighten the image, as well as project it though into the room. Have fun!
Activity by Matt McDonald (Hardy Site Coordinator) and Erin Bigelow (Upham Site Coordinator)
Photo Credit: http://karasclassroom.blogspot.com/