
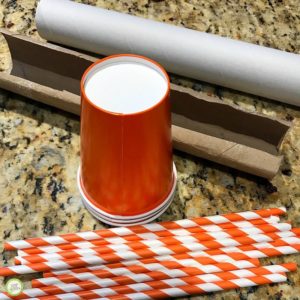
Materials:
- 2 Paper Towel Tubes
- Plastic Cups
- Straws
- Plastic Wrap/Aluminum Foil
- Tape
- Glue
- Tupperware/Bowl
Instructions:
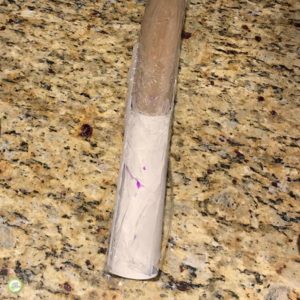
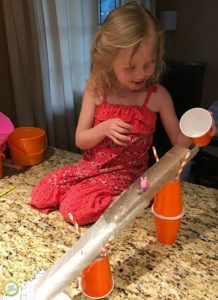
- Cut along one side of the paper towel tube, apply a line of glue down the center and attach a piece of plastic wrap or foil, this will protect the paper towel tube from getting wet. Repeat with a 2nd paper towel tube.
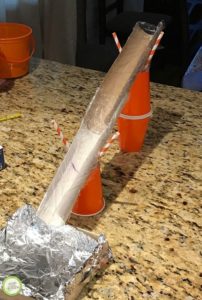
- Attach 2 paper towel tubes, by putting one tube slightly inside the 2nd tube and attach with tape on both sides.
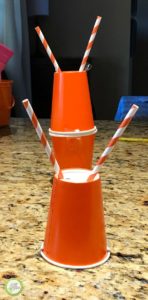
- Build your slide using plastic cups! You need 2 different heights to make it a true slide. Begin by attaching 2 cups, one right side up and one on top that is upside down, use your tape to attach. The lower height can be created just by turning 1 plastic cup upside down.
- Attach your paper towel tubes to the cups using your straws.First, attach the straws to the cups in a Y shape using your tape, or if you feel like they need to be sturdier you can punch a hole in the cup and then attach with tape. The paper towel tubes will be placed in the top middle of the Y shape. If you feel like you have another way to make your slide sturdier then go for it! There is no wrong answer, and you can always try using other materials available to you.
- Design your pool at the bottom of the slide. You can use something as simple as a bowl or tupperware, or find a way to create your own pool using other materials available to you!
- Experiment with your slide! See which toys or items, go down the slide the fastest, and which require more or less water. You can always build another slide after experimenting with this one to see if the outcomes might be different!
Activity by Amanda Cardinal, Upham Site
Photo Credit: www.greenkidcrafts.com